DIY Week #4

Howdy! It's time for another DIY for DIY week! Have you all been enjoying this series? Well, I hope you did and will continue to!

Today we will learn how to make...A Doll-Sized Frame!

A frame can add so much more feeling to you dollhouse. What this tuorial will teach you to make is just practically a frame. What you can do is print a picture of your doll and add it behind the frame and then add it to your dollhouse or any wall! Let's see how to make this, shall we?


What you will need:


- 4 Giant Popsicle Sticks
- Hot glue gun
- Spray Paint 


How to make it


 Lay one Popsicle stick on top of another one, and glue it into place. Repeat for all the others.


The completed product! 


Is that a guilty grin I see on Esther's face? lol

Sorry for a kind of lame DIY.  But it is kind of nice, if you're thinking about it in the same way I am...haha....


DIY Week #3

Wow! It's been a success all week so far! All of your sweet comments make feel really happy about this! Thank you SOOOO much!!

Moving on to today's DIY....


 Today we will learn how to make..... A Doll-Sized Clipboard!


 What you will need:

 ~Scissors 
~Cardboard (not the thick kind. Just cut up a old cereal box, it works!)
~Notebook paper 
~Binder Clip (black works too!)

How to make it

 Cut the size of the clipboard that you'll want on the cardboard. This goes by the size of your doll, I would recommend just estimating.

This is how it ought to be.


Then fold your notebook paper sheet in half. Lay your cardboard on it and cut out 3 rectangles/squares/ etc. that fit on your cardboard.

See?

Then you'll want to attach the binder clip to secure the notebook paper and the cardboard together.

Ta-da! A brand new clipboard for your doll to carry around!


Did you like it? What did you think? Will you make it? 


DIY Week #2

Announcement: Yesterday life caught up with me.....*argghhhh*

Today's DIY is........how to make a purse for your Doll!!!

Let's get started:

What you'll need

 A square piece of cloth
Sewing Machine
Ribbon


 First Step: fold the cloth in half and hem both sides as far in as you think it needs.


Step 2: Cut off excess thread 

Step 3: Take a little ribbon or something 


Step 4: Align the thread where you think it should go


Step 5: Sew it on. Ta-da! A brand new purse for your doll!


Did you like it? Sorry about it being kind of short. Oh yeah, posting schedule is GONNA CHANGE MAJORLY. *coughs* 

lol Anyways, so tell us if your doll made it! (as I said before, I won't take it offensive if you didn't) jk 


DIY Week #1

 forgive me for not posting Sunday Dollpaper yesterday....

Hi everyone! It's time to start off our very first, DIY Week! If you're reading this, I'm very happy! Warning: the DIY'S are probably not that great and you might know them already, in fact I know that some of you know this one....so yeahhhhhh

What is this DIY Week all about? Well, I'll be posting a DIY for your doll each day of this week! So grab your crafting supplies and lets go find out whats in store for us today!


Today's DIY is.... Chocolate Chip Cookies

So you're like, "OH great! Chocolate Chip Cookies! How boring...bye-bye to DIY Week..." Well hopefully you're not like that, and I'm sure you'll at least like one DIY this week.


So let's move on to figuring out how you do this.

What you will need: 

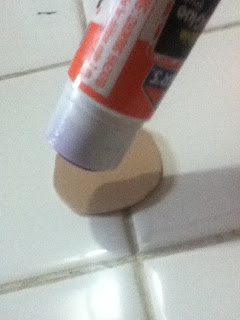
 A Glue Stick


   Anything to measure a circle with.


Scissors 


Two colors of foam: Tan and Dark Brown
 

So now what do you do?
Step 1: Make a imprint on the tan foam with your circular object 
Step 2: Cut it out

Step 3: Cut a thin strip of Dark Brown foam


Step 4: Cut the thin strip into pieces


Step 5: Apply glue onto your 'cookie'

Step 6: Sprinkle the 'chips' onto the cookie


Step 7: Let it dry.


Eureka! You have a cookie for your doll!


 Esther loves cookies and can't wait to eat them! Tell us if you made it for your doll! (we won't take it as a offense if you didn't) haha lol

We hope you enjoyed this DIY and tune in for another one tomorrow!